How to Update your HOSTS file on a PC:
a. Open Notepad (start -> programs -> accessories -> notepad)
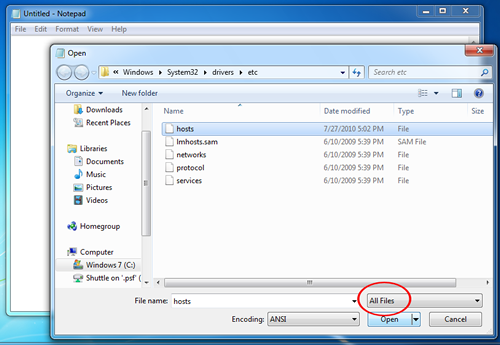
b. In Notepad, open the file c:\windows\system32\etc\hosts (no extension; you will need to choose "All Files" instead of Text files in the browse window)
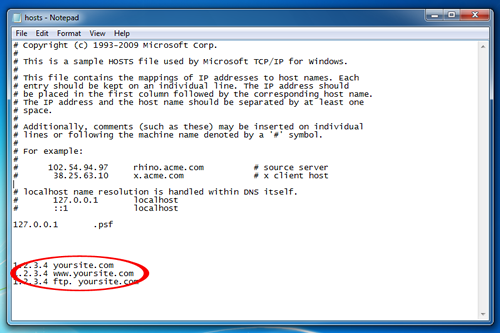
c. Add your new IP address / domain lines at the bottom of this file
d. Save and close Notepad
How to Update your HOSTS file on a Mac:
[Edit: I have found an easier way to do this - the following TERMINAL command will prompt you for your OS X password and launch Text Edit as the root user]
sudo /Applications/TextEdit.app/Contents/MacOS/TextEdit /etc/hosts
[Edit Again: With OSX Lion, the above command no longer works, use this instead:]
sudo nano /etc/hosts
a. Open Terminal (Applications -> Utilities -> Terminal)
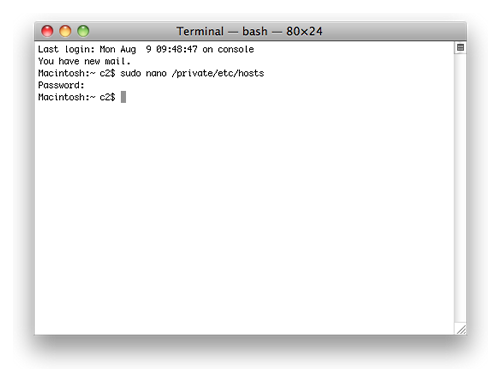
b. Type this command into Termainal: "sudo nano /private/etc/hosts" (without the quotes)
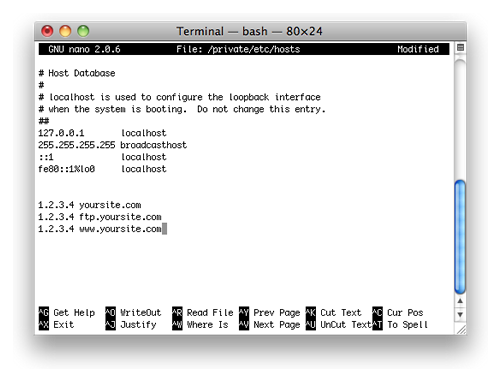
c. The hosts file contains some comments (lines starting with the # symbol), as well as some default hostname mappings (e.g. 127.0.0.1 – localhost). Simply append your new mappings underneath the default ones. Or edit one of the default values if you know what you are doing! You can navigate the file using the arrow keys. When done editing the hosts file, press control-o to save the file. Press enter on the filename prompt, and control-x to exit the editor.
d. On Leopard you can issue a simple Terminal command to flush the DNS cache, and have your host file changes to take immediate effect: "dscacheutil -flushcache" (without the quotes)
